Incident Management
Creating a New Incident
Option 1: Incident During a Day’s Time Clock
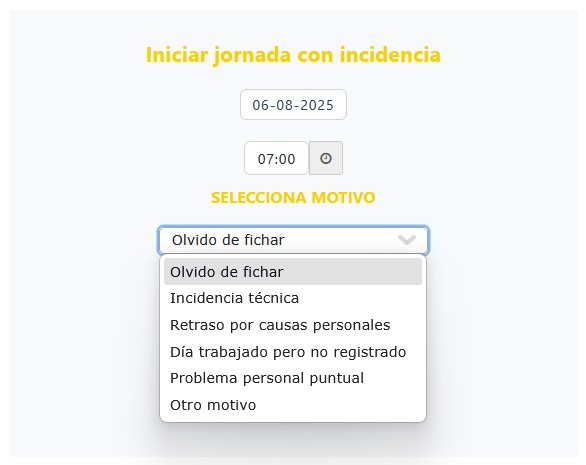
If the check-in or check-out was not done at the scheduled time, you can register the time by creating an incident, indicating the actual check-in or check-out time and the reason.
The manager will receive the request for validation. Until the incident is approved, the hours will not be counted as worked time.
Option 2: Incident on a Day Without Any Time Clock (No check-in or check-out recorded)
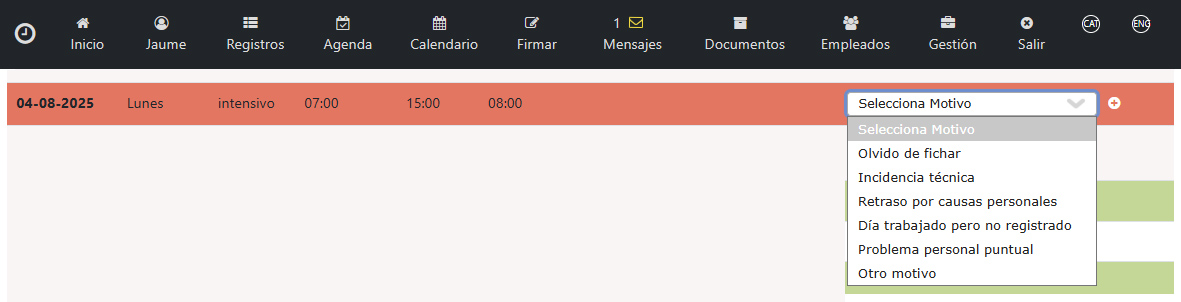
If no check-in or check-out was recorded on a given day, you can create an incident indicating the corresponding time.
The manager will receive the request for validation and, once approved, the hours will be counted as worked.
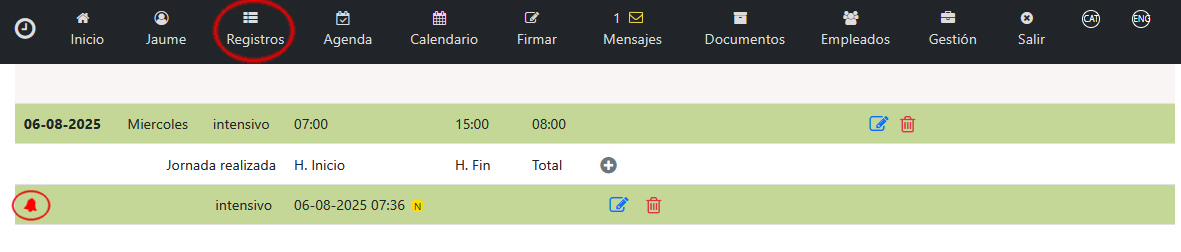
To create the incident, go to the “Records” menu, select the reason on the day without a time entry, and click the “Add” button.
Modifying an Incident
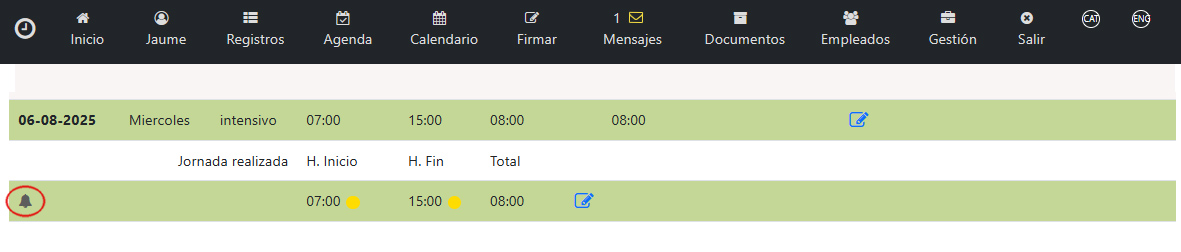
To modify an existing incident, go to the “Records” menu and look for the day with the incident.
You will see a red bell icon, indicating that an incident is open for that time entry.
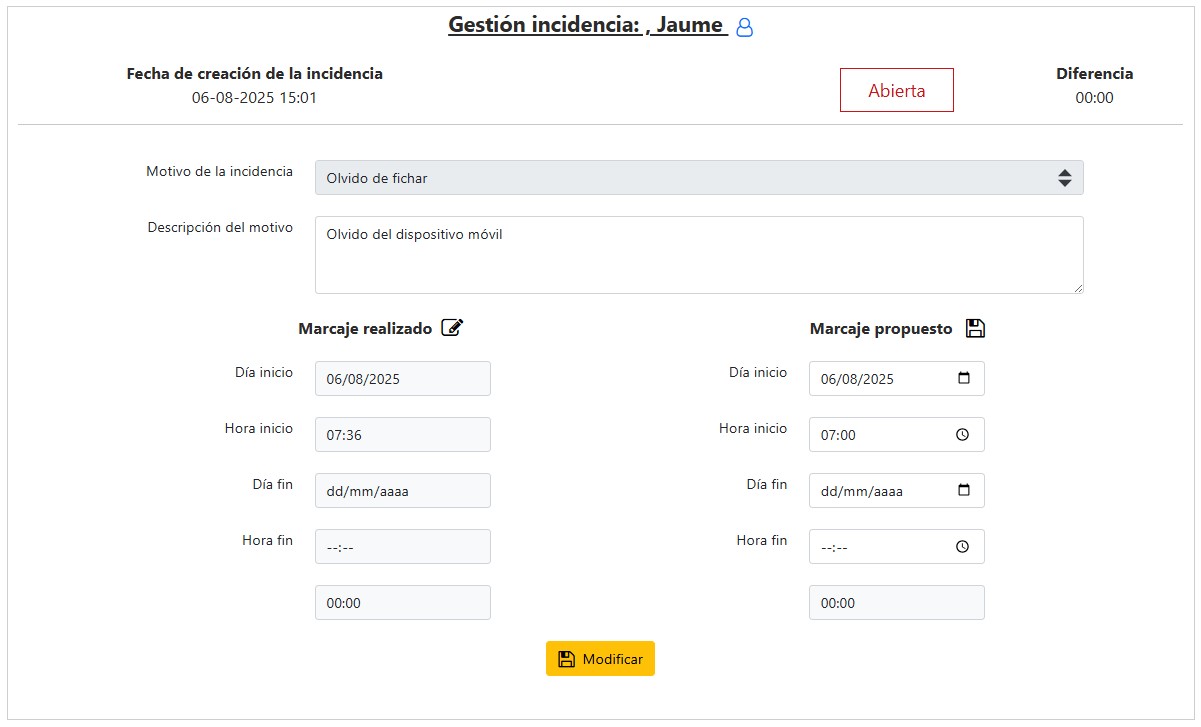
By clicking the bell, the incident information screen will open, allowing you to make the necessary changes.
From the incident management screen, you can:
- Check the status of the request
- Add a description explaining the reason for the incident
- Propose check-in and check-out times, which will be pending approval from the manager