Guide to Upload Supporting Documents
Attach a Justification or Permission to a Clock-in Record
Step 1. Select the clock-in record you want to link the document to
Instructions:
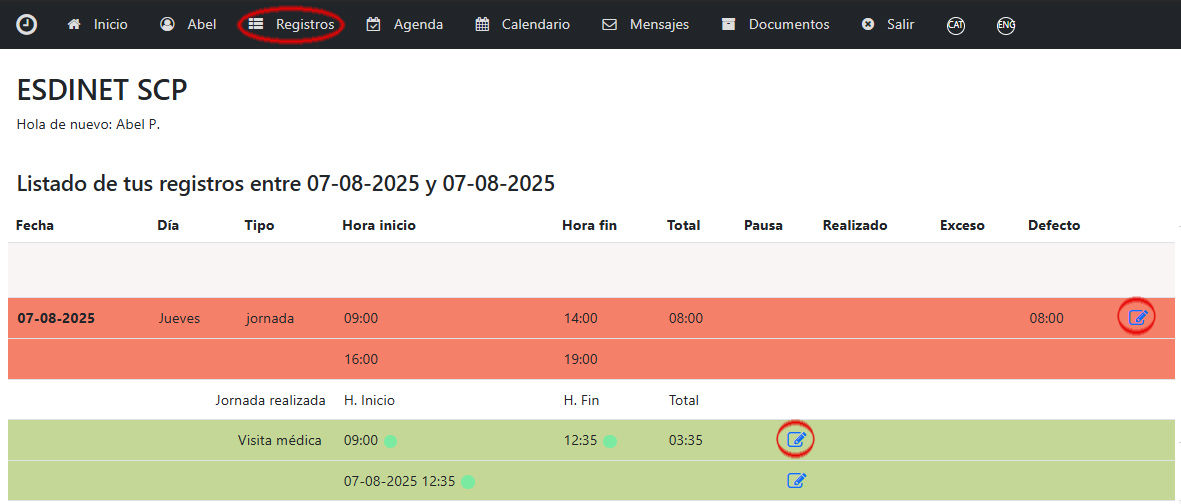
- Go to the “Records” menu from your Etempus account.
- Find the day you want to attach the justification to.
- Click on the clock-in entry for that day to open the details.
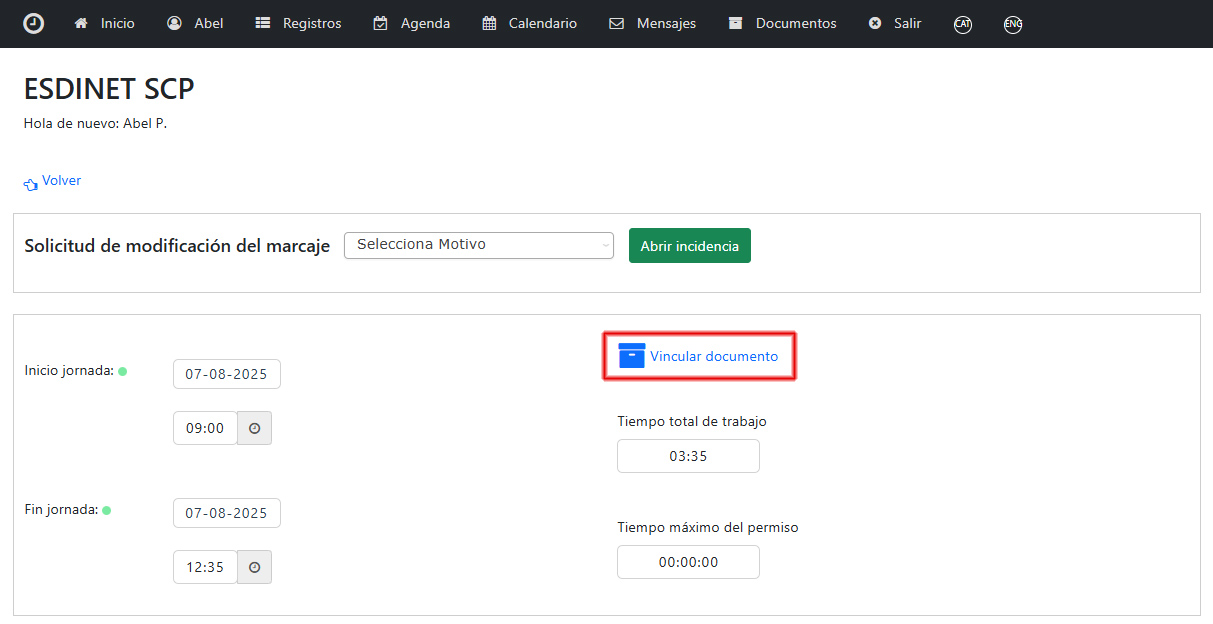
Click on the option “Link document.”
Step 2. Select an existing document or upload a new one
Instructions:
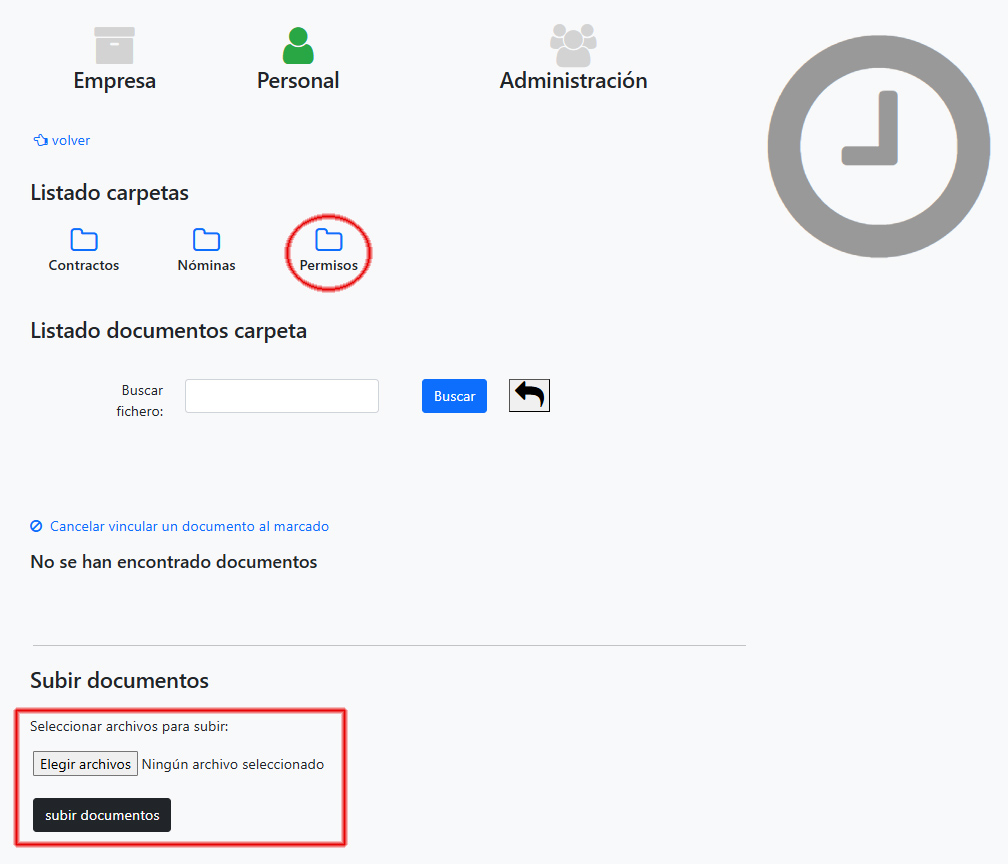
- Select the folder where you want to upload the document, for example the folder “Permissions” (the name may vary depending on the folders you’ve created).
- Click the “Choose file” button at the bottom and select the file from your device. If you’re using a mobile phone, you can also take a photo on the spot and upload it directly.
- Click the “Upload documents” button to attach the file.
Step 3. Link the document to the clock-in record
Instructions:
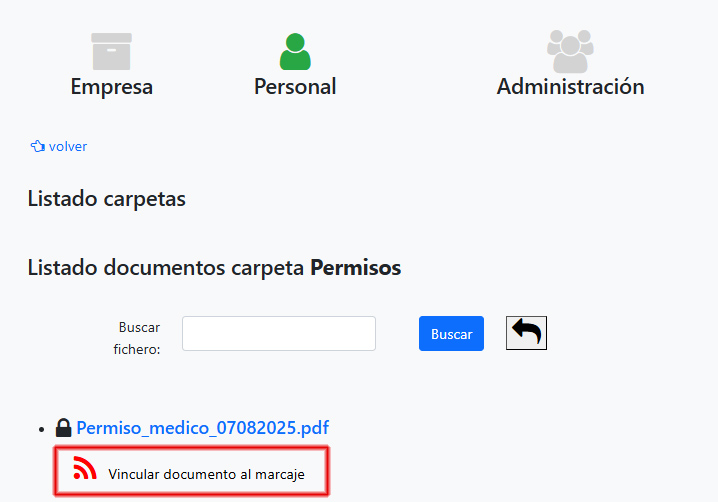
- Click the button “Link document to clock-in.”
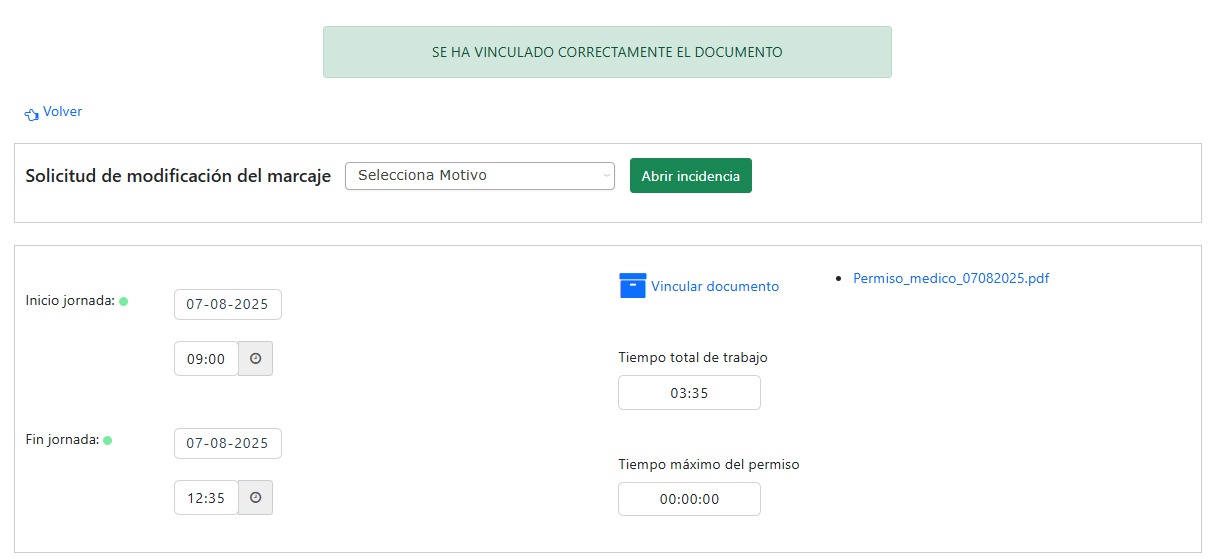
Step 4. View the document linked to the clock-in
To verify that the document has been successfully linked, you can check it from the clock-in detail screen, where the document name and link will appear.
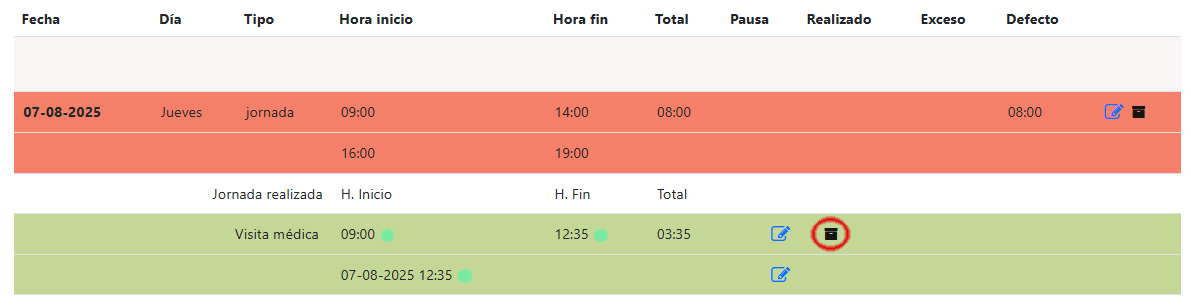
You can also check it from the Records screen, where you’ll see a box icon on the corresponding day, indicating that a document is attached.